
Queen's Domain Weapons: Early Locations and Upgrades
Find Queen's Domain weapons, learn early weapon locations, match damage types, and build a versatile loadout with Endu, the Morningstar, and Azure Torch.
Jump to
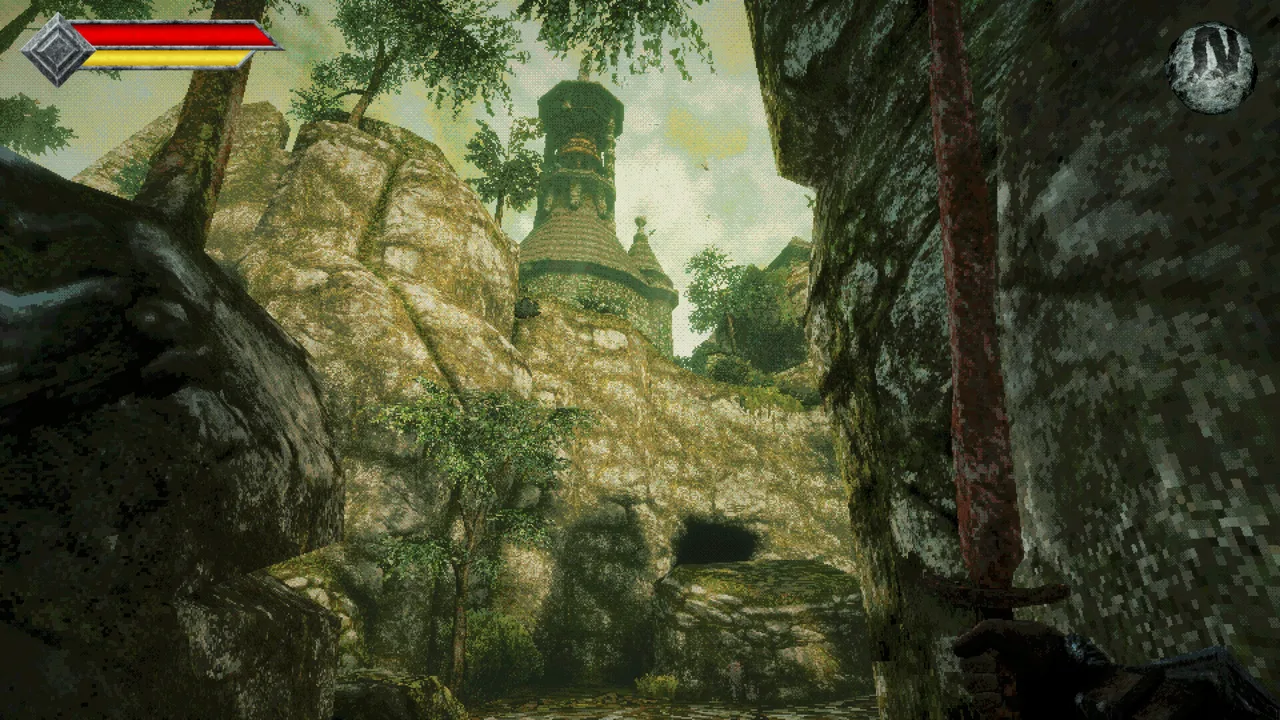
Which Weapons Should You Get Early?
The right Queen's Domain weapons give you room to breathe when enemies crowd the path ahead. Get the Dagger Belt and Rusted Spear early, then work toward Holy Sword Endu, the Azure Torch, and the Morningstar. Together, these pickups expand your reach, cover different damage types, and add rechargeable ranged attacks.
You can equip three melee weapons and three throwing weapons. The full arsenal gives you plenty to experiment with:
| Arsenal category | Available variety | Equipment slots |
|---|---|---|
| Melee weapons | 50+ weapons | 3 |
| Secondary throwing weapons | 20+ types | 3 |
For an early loadout to work toward, equip Holy Sword Endu, Morningstar, and Azure Torch. Endu supplies Slash damage, the Morningstar combines Impact and Pierce, and the torch adds magical fireballs. Keep throwing weapons equipped alongside them so you can pull enemies away from groups and attack targets above melee range.
Before those options become available, collect the Rusted Short Sword, Rusted Spear, and Wooden Club. They introduce all three physical damage types without requiring a shopping trip.
Official page: Queen's Domain (store.steampowered.com)
Early Weapon Locations and How to Reach Them
Rusted Short Sword: Speak to Commander Ekonta
From the starting beach, follow the path through the rocks toward the knights’ camp. Speak to Commander Ekonta to receive the Rusted Short Sword, then equip it from your inventory.
This is your starting Slash weapon. Use it to break nearby containers and the wooden barricade leading to the first Crystal Monument. Let your Power Meter recover between strikes; rapidly tapping attack makes even breakable objects take far longer to destroy.
Dagger Belt: Explore the Shore Near the Shipwreck
From the first Crystal Monument:
- Climb the nearby stairs.
- Take the first right through the gap in the rocks.
- Turn right again and follow the coastal path past the Ratty Bugs and Forest Eyes.
- Look for two small offshore islands and a sparkling pickup on the farther island.
- Jump across both islands and collect the belt hanging from a branch.
The Dagger Belt gives you three Throwing Daggers to start. Their charges recover over time, so using them does not permanently consume ammunition.
Use daggers to eliminate the elevated Forest Eyes along the return route. They also let you attract a single ground enemy, retreat to open space, and fight without bringing the whole group along.
Water costs health and returns you to shore, so line up each jump before committing.
Rusted Spear: Open the Chest in the Coastal Tower
Return along the coastal path after collecting the Dagger Belt. Near the route back toward the first Crystal Monument, a Chilopoda guards a tower.
Keep your distance and use Throwing Daggers against it. Its bite can inflict poison, making an extended close-range exchange costly. Once the entrance is clear, open the chest inside for the Rusted Spear.
Its special attack combines a strike with a backward movement. Use it to attack while creating separation, especially when an enemy is closing in. Leave room behind you before activating it; retreating into a wall defeats the purpose.
Wooden Club: Search the Underground Dungeon
The Wooden Club is in a chest in the northern room of the underground dungeon’s first lower floor.
To reach this dungeon, take the uphill route northwest of the starting Crystal Monument and drop into the lower valley. Look for the entrance near the braziers. Throw a dagger into its diamond-shaped opening to unlock the door.
Clear enemies gradually, backing toward the entrance ramp when you need space. Collect the club before continuing deeper.
The club deals Impact damage. Its secondary attack is a forward pounce, giving you another way to close distance without relying on its slower normal swing.
Holy Sword Endu: Defeat the Shrine Guardian
Continue through the underground dungeon to find the Endu Shrine Gate Key at the shrine on the lower level. Return to the coast near the Dagger Belt islands and find the fenced shrine entrance.
Before entering, save at a Crystal Monument and prepare healing items. The Shrine Guardian waits inside.
Watch its sword windups, particularly the overhead attack with its long reach. Use the Rusted Spear’s retreating special to help maintain distance, and avoid getting trapped against the arena’s edges.
After defeating the guardian, interact with it to receive the Stone Duck Figurine, then continue past it to collect Holy Sword Endu.
Endu gives you Wind Dash, opening routes across gaps and toward elevated platforms. The figurine unlocks access to the shop through Crystal Monuments.
Azure Torch: Visit the Tower of Knowledge Entrance
You can collect the Azure Torch before opening the Tower of Knowledge.
From the Cemetery Precipice Crystal Monument, head toward the tombstones to the northwest. Look down toward the bridge near Endu Shrine, descend, and use Wind Dash to cross the bridge.
On the other side, turn right and climb east, then turn left toward the tower entrance. Collect the glowing blue torch outside the door.
The torch serves as a light source and launches blue fireballs with its secondary attack. Those projectiles can ignite enemies for damage over time. Keep it equipped while using another weapon so its magical charges continue recovering.
It also has an exploration role: swing the torch at the mouths of the island’s gargoyle beacon statues to light them. Lighting all three beacons opens the Tower of Knowledge.
Morningstar: Buy It for 20 Ancient Coins
After unlocking the shop with the Stone Duck Figurine, you can purchase the Morningstar for 20 Ancient Coins.
Its combination of Impact and Pierce damage complements Endu’s Slash attacks. This lets you cover the three physical damage types while leaving your third melee slot available for the Azure Torch.
Buy additional throwing charges before spending freely on other equipment. More available throws help you clear ranged hazards and manage groups throughout exploration.
Match Damage Types and Manage the Power Meter
A weapon’s animation does not determine its damage type. A sword thrust can still deal Slash damage. Read the inventory description and consult the Bestiary when an enemy seems unusually resistant.

| Physical damage type | Early weapon examples |
|---|---|
| Slash | Rusted Short Sword, Holy Sword Endu |
| Pierce | Rusted Spear, Morningstar |
| Impact | Wooden Club, Morningstar |
Switch to a damage type the enemy is weak against rather than repeatedly forcing attacks through resistance. Keep different types available even when you have a favorite weapon.
Your yellow Power Meter also controls melee damage. Attacking with a full meter delivers full-strength normal hits; swinging repeatedly with an empty meter produces very little damage.
Build your combat rhythm around recovery:
- Land a hit, move out of reach, and let the yellow meter refill.
- Hold the primary attack input to build the blue charge for a stronger blow.
- Start charging while the Power Meter is recovering when you have room.
- Stop sprinting before committing to a melee exchange, because running drains the meter and prevents recovery.
Clear overhead threats and establish space before charging.
Against enemies with a dangerous lunge, watch their attack range before choosing how to retreat. Backpedaling alone can leave you inside the strike.
Weapon Leveling, Endu Evolution, and Wind Gems
Melee weapons gain experience through use and become stronger as they level. Keep using a weapon you handle comfortably, while switching when an enemy’s resistance calls for another damage type.

Practice unfamiliar special attacks against enemies you already understand. Learn whether the move advances, retreats, or leaves you waiting through a long recovery before taking it into a narrow corridor.
Endu Changes Form as It Grows
Holy Sword Endu evolves into more powerful forms as you level it.
Use Endu regularly to develop it, but keep your other weapons available for enemies that resist Slash damage.
The Storm Gem in the Tower of Knowledge activates Endu’s special attack meter. This is separate from the Wind Dash charge display, so do not confuse an inactive special meter with a problem using the dash.
Wind Gems Add More Dashes
Collecting Wind Gems adds Wind Dash charges, displayed as diamonds near the Power Meter. These charges replenish over time.
You can find a second Wind Gem in the small tower reached from the raised route east of Cemetery Precipice. Use the nearby broken tower and rubble to reach it.
With two charges, you can chain two aerial dashes to cross wider gaps. Revisit platforms, broken bridges, and elevated pickups that were beyond your earlier range.
Endu’s dedicated Wind Dash input remains available while another weapon is equipped. Practice using it with your normal combat loadout so you can reposition without first swapping back to the sword.
Weapon Evolution Fix in Version 1.01.01
Version 1.01.01 addresses a freeze associated with weapon evolution.
| Version | Weapon-related fix |
|---|---|
| 1.01.01 | Fixed a freeze when weapons evolve |
Install the update before continuing to develop evolving weapons. Save manually at Crystal Monuments after collecting valuable equipment or finishing a difficult stretch; resting and saving are separate actions.
Use Throwing Weapons and Magic Between Melee Attacks
Throwing weapons and magical attacks give you options while your melee Power Meter recovers. Their resources work differently, so watch the relevant HUD indicators.
Increase Your Available Throws
Throwing weapons return after a cooldown. Additional copies increase how many throws you have available before waiting for recovery.
Spend early Ancient Coins on extra Throwing Daggers, then expand your other throwing options as you acquire them. Shop stock grows as you obtain additional duck figurines from bosses.
Use your available throws to:
- Remove Forest Eyes before fighting enemies beneath them.
- Pull an individual enemy away from a group.
- Hit flying enemies that remain above melee reach.
- Activate diamond-shaped targets that open doors.
- Maintain pressure while you create space for another melee strike.
Let the Azure Torch Recharge in Your Loadout
The Azure Torch stores magical energy while equipped, including when another weapon is currently active. Its blue HUD gems show when fireballs are available.
Keep the torch in a melee equipment slot, fight with Endu or the Morningstar, then switch when a magical charge is ready. Use fireballs against enemies across gaps or in positions that would make a melee approach awkward.
When firing over a low ledge, jump before launching the projectile to help it clear the rock face. Use throwing weapons for flying targets that are difficult to catch with the torch.
Status Effects That Interfere With Your Weapons
A sudden loss of damage or access to an attack can come from a status effect. Open your inventory and inspect the Status entry when your usual combat rhythm stops working.
| Status effect | Effect on your combat options |
|---|---|
| Webbing | Prevents throwing weapon use |
| Magic-blocking curse | Prevents magic use |
| Damage-reducing debuff | Reduces damage dealt |
When webbing prevents throws, use your melee weapons while you work toward safety. When a curse prevents magic use, rely on physical attacks and throwing weapons instead of waiting for a magical attack to activate.
Keep status remedies accessible before entering a dangerous area. Most status effects fade over time, and resting at a Crystal Monument removes negative effects while restoring health. Resting also respawns enemies, so account for the route you will need to cross afterward.
For areas where the same status keeps returning, equip accessories that resist it or shorten its duration. Watch which attack applies the effect and adjust your spacing before spending another cure.
Continue with
 Queen's Domain Azure Torch: Location and Puzzle GuideFind the Queen's Domain azure torch, light all three bell gargoyles, solve the Tower of Knowledge puzzle, and use its fire magic against two major bosses.
More in Weapons
Queen's Domain Throwing Weapons: Dagger Belt & Tips
Master Queen's Domain throwing weapons with dagger belt locations, cooldown basics, combat tips, ranged loadouts, and solutions for early island puzzles.
Queen's Domain Trident: Location and Key Unlock Guide
Find the Queen's Domain trident, learn how its max-level upgrade yields a key, and track down all four trident keys for the temple's optional loot puzzles.
Queen's Domain Weapon Upgrades: Endu and Gear Guide
Master Queen's Domain weapon upgrades with weapon leveling tips, Endu evolutions, Wind Gem locations, and the Trident upgrade that unlocks extra loot.
Continue exploring
Queen's Domain Combat Guide: Hit Harder, Take Less
Use this Queen's Domain combat guide to master the power meter, exploit enemy weaknesses, choose early weapons, and prepare for tougher fights and bosses.

Queen's Domain Special Attacks: Weapons and Upgrades
Master Queen's Domain special attacks with the Rusted Spear, Azure Torch, and Endu. Learn how power, magic charges, and the Storm Gem shape your combat.
Join the community
Official channels for news, updates and player help: