
Queen's Domain Combat Guide: Hit Harder, Take Less
Use this Queen's Domain combat guide to master the power meter, exploit enemy weaknesses, choose early weapons, and prepare for tougher fights and bosses.
Jump to
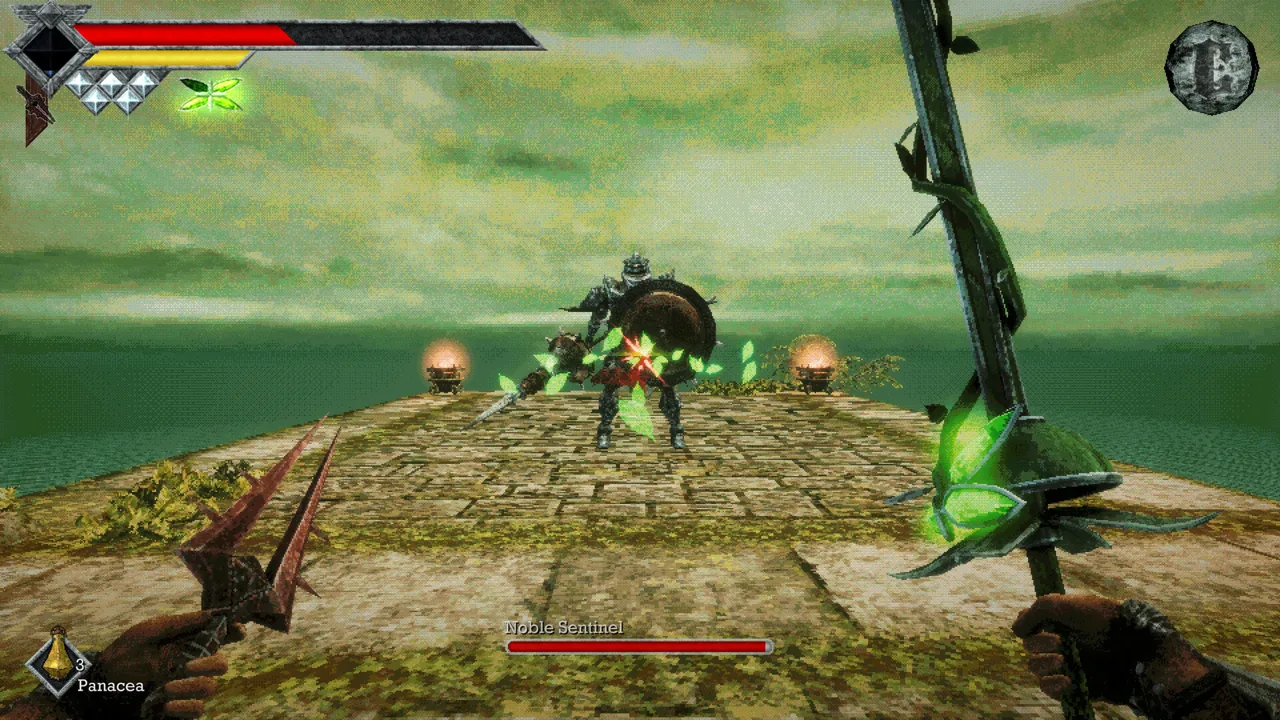
How to Fight: Recover Power, Create an Opening, Then Strike
Rushing your next swing can turn an ordinary enemy into a damage sponge. This Queen's Domain combat guide explains how the power meter, damage types, and rechargeable throwing weapons help you survive longer fights. Start by letting your melee attacks recover instead of swinging whenever you can.
The yellow Power Meter determines your melee attack strength. A full meter gives you full-strength hits; attacking with an empty meter produces very little damage. Repeated swings keep the bar low, stretching out encounters while giving enemies more opportunities to hurt you.
Practice this rhythm against an isolated enemy:
- Approach with your Power Meter full.
- Watch its attack windup and move beyond its reach.
- Strike during the opening after its attack.
- Create space while your power recovers.
- Repeat without forcing an extra swing.
There is no traditional block, parry, or dodge roll. Your defense comes from positioning and learning how far each enemy can reach. Backpedaling works against some attacks, but lunging enemies can catch a straight retreat. Try moving sideways around the attack while keeping your escape route clear.
Charge attacks without trapping yourself
Holding the primary attack builds a stronger strike, shown by the Power Meter turning blue. You can begin charging while the yellow meter is still recovering.
The tradeoff matters: holding a charged attack prevents running, Wind Dashing, and throwing weapons. Prepare the charge while you have room, then release it into a safe opening. Avoid starting a long charge with an enemy already attacking at close range.
Running also drains your Power Meter and prevents it from recovering while you continue sprinting. Stop running before committing to melee so you arrive ready to deal damage.
Official page: Queen's Domain (store.steampowered.com)
Collect Your Early Combat Kit
The opening area contains several tools that broaden your options before the first boss. Pick them up rather than relying entirely on the starting sword.
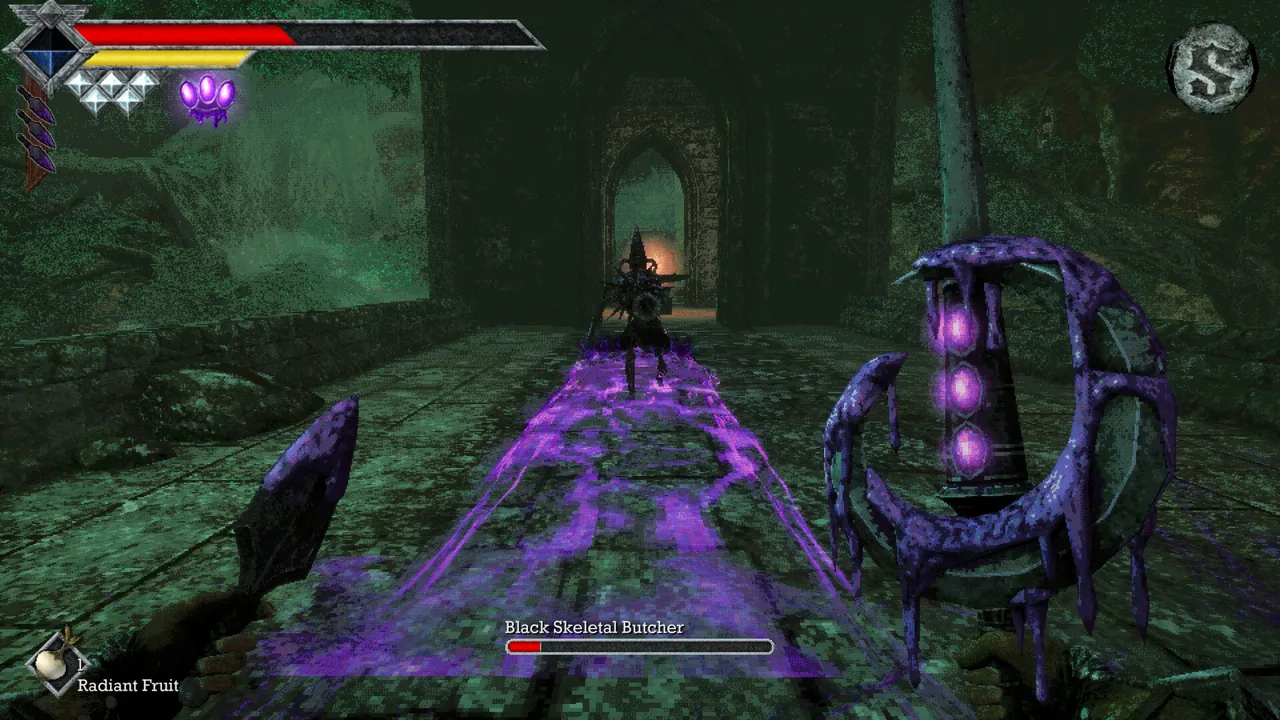 Image: Steam / Freshly Baked Games LLC
- Starting sword: Talk to the guard to receive it. Break the nearby box for an elixir before leaving.
- Spear: Head up the stairs into the tower to collect it.
- Dagger Belt and throwing knives: Explore the shore near the shipwreck and the small offshore island. Equip the knives after collecting them.
- Wooden club: Search the underground route through the ruins while working toward the shrine gate key.
The spear gives you extra reach, which helps when you need to attack while keeping an enemy outside its own striking distance. The club adds impact damage, giving you an alternative when your sword or spear performs poorly.
Breakable crates and the opening wooden barricade can take several hits. Keep attacking them rather than assuming they are permanent obstacles.
Find the Crystal Monument just beyond the barricade and remember the route back. Later, use a throwing knife on the ruins switch that opens the shortcut toward the starting area. That shorter return trip makes healing and saving much easier while you gather equipment.
Match Damage Types and Level Your Weapons
Queen's Domain uses slashing, piercing, and impact damage, with enemies having different weaknesses and resistances. Check weapon descriptions instead of judging by animations: a sword thrust can still deal slashing damage.
 Image: Steam / Freshly Baked Games LLC
Build your equipped selection around different damage types:
| Weapon | Damage type |
|---|---|
| Holy Sword Endu | Slashing |
| Spear | Piercing |
| Wooden club | Impact |
| Morningstar | Impact and piercing |
The Morningstar costs 20 Ancient Coins at the shop. Its two damage types complement Endu's slashing attacks, making it a useful purchase when you want broader coverage without giving up the sword.
Open the bestiary when an enemy takes unusually little damage. Switch to a listed weakness before assuming you need to grind levels. Reach also matters: use the spear when its distance lets you land clean hits more safely.
Weapons gain experience through use. Keep developing weapons you enjoy, but maintain alternatives for resistant enemies. Test each weapon's secondary attack somewhere familiar so you know whether it moves you forward, how it reaches the target, and how much space you need afterward.
Weapon evolution and combat fixes
The October 31 update, version 1.01.01, addresses two freezes relevant to fighting and weapon progression:
| Version 1.01.01 fix | Affected situation |
|---|---|
| Fix for freeze when weapons evolve | Weapon evolution |
| Fix for Mimic freeze bug | Mimic encounters |
Install the update before continuing if either freeze has interrupted your progress.
Use Throwing Weapons Between Melee Attacks
The Dagger Belt's projectiles replenish after a cooldown. Throwing a knife does not permanently consume it, so use your available charges throughout exploration.
 Image: Steam / Freshly Baked Games LLC
Throwing weapons serve several purposes:
- Pull an enemy away from a group before entering melee.
- Attack elevated threats such as Forest Eyes.
- Damage approaching enemies while your Power Meter recovers.
- Activate distant switches that open paths and shortcuts.
Use a throw to draw an enemy toward ground you have already explored. Fighting there gives you more room than charging into a chamber full of enemies.
Later, you can equip three melee weapons and three throwing weapons. Rotate between them as their resources become available, including magical weapons with their own recharging abilities. Remember to release a held melee charge before trying to throw.
Reposition with Endu's Wind Dash
Once you obtain Holy Sword Endu, its Wind Dash gives you another way to create distance. The dedicated dash remains available even when another weapon is equipped.
Wind Dash charges appear as diamonds and recover over time. Additional Wind Gems increase your available charges, opening longer crossings and new routes.
Practice the movement on safe ground before depending on it during a difficult encounter. Use it to escape pressure or reposition, but allow your Power Meter to recover before your next melee commitment.
Recognize Status Effects Before Changing Your Build
A sudden drop in damage or missing throwing attacks can come from a status effect. Check the Status entry in your inventory when your usual combat rhythm stops working.
| Status effect | What it does |
|---|---|
| Poison | Gradually drains Life Points |
| Heavy | Slows movement and Power Meter recovery |
| Weaken | Increases damage taken |
| Disease | Reduces damage dealt |
| Sticky | Prevents throwing weapon use |
| Binding | Prevents magic use |
| Paralysis | Prevents movement and attacking |
| Azure Flame | Drains Life Points through burning |
| Magic Rot | Builds up, then rapidly drains Life Points |
Sticky can remove your ranged option, while Binding disables magical abilities such as the Azure Torch's projectile. Keep a physical melee option available rather than relying entirely on those tools.
Resting at a Crystal Monument removes negative status effects. Effects can also expire over time; retreat somewhere safe when waiting out a non-damaging effect. Watch your health closely with Poison, Azure Flame, or Magic Rot.
Equip accessories suited to recurring threats. In poison-heavy areas, use talismans that reduce how long the effect lasts. Preserve rarer status-curing consumables for situations where returning to a monument would be dangerous.
Spend Coins on Charges and Use Your Supplies
Defeating the first boss, the Shrine Guardian, awards a duck figurine that unlocks access to the shop through save points. Later boss figurines expand its inventory.
Prioritize additional throwing weapon charges when you want more ranged attacks available before a cooldown. When you acquire a new throwing weapon, check the shop for additional charges for it.
Sell items classified as Treasure for Ancient Coins. Keep collecting coins and valuables during exploration so you can afford weapon and accessory purchases. Avoid spending your early funds on ordinary healing items while you are finding supplies in the world.
Healing herbs appear among ground pickups, enemy drops, and breakable containers. Use them to preserve a promising dungeon run instead of carrying everything until you die. Keep some healing and useful stat buffs for boss attempts.
Eat food for lasting improvements
Food can increase your stats permanently. Broiled Meat increases Attack Power, while steamed clams increase attack speed.
Inspect meals and food pickups rather than treating them as ordinary healing supplies. Search hidden rooms, and pay attention to stationary skeletons pointing toward suspicious walls. Optional discoveries can strengthen your character before the next required fight.
Keep frequently used healing and remedies in your Quick Slots. Remove unnecessary items from those slots to reduce how much you need to cycle through under pressure.
Prepare for Bosses and Protect Your Progress
Before challenging a boss, return to a Crystal Monument, restore your health, and manually save. Resting and saving are separate actions: resting heals you and clears debuffs, but it does not replace saving.
Saving alone does not respawn enemies. Resting does, and enemies can also return after time has passed. Recheck familiar paths instead of assuming a previously cleared route is still safe.
For a boss attempt:
- Carry healing items and relevant status remedies.
- Equip weapons with different damage types.
- Refill your available throwing and magical resources.
- Learn the enemy's reach before committing to charged attacks.
- Keep enough room behind or beside you to disengage.
If an area feels far beyond your current equipment, inspect newly defeated enemies in the bestiary. A high entry number separated from your recent discoveries by many empty entries is a warning to explore another route first.
Some later areas are accessible early, and optional treasures can require additional Wind Gems or key items. Return to unresolved paths after your movement improves rather than spending your healing supply forcing every obstacle on the first visit.
Continue with
 Queen's Domain Special Attacks: Weapons and UpgradesMaster Queen's Domain special attacks with the Rusted Spear, Azure Torch, and Endu. Learn how power, magic charges, and the Storm Gem shape your combat.
More in Combat
See all CombatContinue exploring
Queen's Domain Accessories: Stats, Charms, and Shops
Learn how Queen's Domain accessories affect your stats, where to find and buy them, and how to choose resistance bonuses against dangerous island enemies.
Queen's Domain Achievements: All 53 Unlocks and Route
Track 53 Queen's Domain achievements with exact unlock requirements, collectible goals, boss milestones, four endings, and a practical completion route.
Join the community
Official channels for news, updates and player help: